 For over a year now, I have been working to change my consumer choices and move closer to a low-waste lifestyle. If you're new to the movement, there are some great bloggers and some good resources here and here out there to help you learn more. The growing global plastic pollution crisis has brought to light a the need for low waste, zero waste, and plastic free alternatives to the products we consume on a regular basis. Many companies have gotten on the bandwagon already. Kroger (the largest grocery store chain in the US) plans to phase out plastic shopping bags by 2025. Google is setting their sights on becoming zero waste at all of their data processing centers, which means that "when waste leaves [their] data centers, none of it goes to a landfill". Procter & Gamble, Unilever, Nestlé, PepsiCo, Danone, Mars Petcare, Mondelēz International and others just announced plans to develop closed closed loop consumer supply chains for a lot of products you know and love. Some may argue that these are PR stunts and aren’t reflective of a company’s desire to reduce their pollution footprint because it’s motivated by trying to generate buzz amongst their target markets. However, I would argue that these are still powerful examples that will still generate positive change in our perception of waste as consumers. Consumer habits are changing and companies that rely heavily on consumer perception of their brand are waking up to this movement. I was thinking back about some of the first changes I made when I began this lifestyle change. The first intentional low waste product I bought was a set of cotton nursing pads that I use as reusable cotton rounds. Although it's more than one year later and I am still far from being zero waste. This time has been an eye opening learning opportunity for me while I've worked to reduce the trash I consume. I wanted to share some of the most important takeaways from this year. 1. The term #Zerowaste is Misleading#Zerowaste may be the buzzword, but the movement isn't about fitting all your trash in a mason jar. Although that is an admirable goal, getting to that point can be a very long process. When the average American creates 4.40 lbs of trash per day (that's 132 per month, 1,606 per year), I think that any change is better than giving up because you don't think you can immediately fit all your trash in a jar. The biggest take away I’ve learned from this movement is that it is primarily about educating yourself on this environmental impact of your consumer choices. The next time you're planning to go shopping for food, clothes, or take out, ask yourself, "How can I reduce the amount of single use plastic I consume with this choice?" Whether your answer is bringing reusable bags, buying clothes second hand or from fabrics that don't contain plastic, or bringing your own container to a restaurant. Use this question to help guide your consumption choices as you start your zero waste journey.  2. There isn’t a lot of education on correct recycling practices Most people don’t realize what happens to your recyclables after you stick them in the single stream bin. Local recycling programs aren’t wishing wells for plastics and other household items. Anything that goes in the recycling bin needs to be free of food waste. That means no pizza boxes, plastic to go containers need to be cleaned out and dry. Thin flexible papers like paper towels, toilet paper, facial tissues, and tissue paper are all non-recyclable. For more info on why paper towels and other paper products can't be recycled, check out this article. For more info on recycling contamination check out this video. 3. Because you end up making a lot more stuff, everything takes longerWhether it’s making toothpaste, laundry powder, or meals that don’t involve packaged ingredients, most zero waste options require more preparation. I think this can be a barrier for a lot of people from joining the low waste movement. If you have kids or work late, it’s exhausting to have to come home and cook a low waste meal when what I really want is a frozen pizza that can be ready in 20 minutes. While meal planning and prepping ingredients ahead of time are helpful, realistically this is still a part of zero-waste living that I struggle with. 4. Shopping takes more planning When I go grocery shopping I take a lot of things with me. I bring glass containers for the bulk section, produce bags, and grocery bags on every major grocery trip. That means I have to plan what I'm buying so that I have enough jars and produce bags and I have to plan when I'm going. If I want to go shopping on my way home from work, that means I need to have my jars and bags packed before I leave for the office. There have been many times where I have forgotten a tiny jar for a spice I needed on my list or forgotten to check if my coffee jar was low when making my shopping list. Yes, this creates more work, but in my eyes the extra time is worth getting closer to the low waste lifestyle I want to lead.  5. People have mixed reactions when they see your zero waste choicesSome aren’t the best reactions, I’ll admit. I’m fairly certain my family thinks I’m a dirty hippie whenever I start talking about zero waste. I’ve gotten eye rolls at checkout for asking if produce bags count towards the store’s reusable bag reward policy. But I’ve gotten a lot of positive feedback from friends and strangers alike too. I’ve gotten compliments from strangers when I’m checking out at the grocery store with my jars and produce bags and I’ve gotten thanked for bringing my own canvas bag to Walgreen’s when I’m on a quick run for batteries. There’s good and bad but you shouldn’t let anyone make you feel less about the ways you’re trying to help the planet. 6. The Visibility of your zerowaste choices does matterOne of the things I notice when I grocery shop now is the ridiculous amount of produce bags people use. It boggles my mind that people find it necessary to waste a produce bag on a head of garlic or one apple. Or when people specifically ask for plastic bags instead of paper at checkout. Frustrations like those make me question if the reusable grocery and produce bags I bring to the store make a difference. Then I remind myself of all the plastic bags I have diverted from the landfill. I’ve run out of my plastic AND paper bag stash before. And haven’t brought home a single produce bag in the past year. One of the beautiful things about the visibility of zero waste is that your individual decisions create a ripple effect. I like to imagine that when people see me with my produce bags, or my glass jars in the bulk section, or my reusable coffee cup it makes them think twice about their trash decisions. My hope is that it inspires them to re-examine the waste they create and make a change in their consumer choices.
0 Comments

I love budgeting. It’s a huge part of my professional and personal lives. But I also understand that most people cringe when I talk about it. People can have a lot of preconceived notions about why not to budget: It takes too much time, I feel guilty when I spend outside my budget, or I don’t know where to start. But there are also a lot of reasons why you should budget anyway.
Excuses I've Made Before
It takes too much time
If you do a little bit at a time each week, it won’t take as much time as you think. Set yourself up for success by rewarding yourself when you work on your budget at home. Make it something to look forward to by using it as your time to enjoy a nice coffee, have a glass of wine, or put on a face mask. Budgeting doesn’t have to be this thing you dread if you give yourself a little incentive to get it done. I feel guilty when I spend outside my budget Budgeting isn’t about feeling guilty. Budgeting is about taking better ownership of your expenses. To quote my favorite financial feminists, Sallie Krawcheck, Co-Founder and CEO of Ellevest, “If you want a latte, buy a frickin latte”. Leaving zero room for for fun expenses like lattes, drinks with friends, or avocado toast, you are setting yourself up to fail. Only budgeting for the essentials like rent and food may sound like the responsible decision, but life happens. You’ll want to get drinks with friends or need a to-go breakfast to motivate you out of bed for work or class. If you set the unrealistic expectation of not budgeting for these “splurges” you’ll never have a month where you “stuck to your budget”. So if you want the dang latte, get the dang latte. The important thing is to do so in a way that is proportional to your income by making a budget that is a realistic goal. I don't know where to start Starting any new habit can be challenging. Sometimes we get stuck on a preconceived notion we carrying into learning how to budget. Maybe you’ve tried budgeting before and you had a bad experience. Maybe you feel that if you don’t start, you can’t fail. Maybe you get stuck on trying to figure out how to estimate how much to budget for a certain category. When you don’t know how to begin, one of the easiest places to get started is just by categorizing the expenses you make every month. With these three steps I want to teach you how easy getting started can be. Step 1: Picture Your Future Financial Self
One of the financial goals I have for myself is to pay off my student debt. For me, this is a big goal and I understand that realistically I’m not going to accomplish this in one or even two years. There is so much that I’m looking forward to in life that my debt holds me back from. I want to make pasta in Italy. I want to have space to grow my own herb garden. I want to live somewhere with an in-unit washer/dryer so I don’t have to walk up and down two flights of stairs for every load of laundry. I want to be the cool aunt who brings back goodies from her adventures. I want to order a glass of wine from a menu without looking at the prices first!
What are the goals in your head? When you get stuck or lose that motivated feeling when it comes to your monthly expenses, remember the vision you have of your future self. Ask yourself how the individual steps you’re taking this month are getting you to that goal. It may feel like $30 in your savings account doesn't make a difference or that a recurring $20 a month towards a Retirement Account won't amount to anything, but you’re wrong. You may be starting small, but building a well-tuned financial mindset is what’s going to serve you in the long run. You may be starting small now, but you won’t be there forever. Step 2: Every Month, Categorize each of your Expenses
On Sundays I go through my checking account and credit card transaction histories once a week and sort each expense into one of the categories I’ve set up in my budget spreadsheet. The purpose of this exercise isn’t to make you feel guilty about every single purchase. Rather, the point is to make you feel more aware of where your money is going. Let that awareness and the financial goals you made guide you during this budgeting process. Use the template below to keep a log of each purchase you make throughout the course of one month. As the month progresses you’ll get a better picture of what your spending habits. When you’re setting up that first month and it’s too hard to estimate how much you’re going to spend in each category, it’s okay to skip it or make a guess that ends up being wrong. That’s okay. Getting started is half the battle.
Step 3: Take a Look at Those Numbers and Reevaluate for Next Month
Did the amount you spent in each category line up with your estimate? Were you surprised? What did you learn about your spending habits? When we see exactly how much we spent on a single category like work lunches in a single month it can be pretty surprising. Before you start over for the next month, take time to reevaluate each category. Did you make estimates on how much you expected to spend on each type of expense? Did you meet the goal or did you miss the mark? If you did, that’s okay. Think about the decisions you made over the month and what you would change to do better next time.
Why I started Budgeting
I used to have so much anxiety surrounding my own finances. I would feel so guilty in the grocery store for choosing $1.89 mac and cheese boxes over 29 cent ramen packets. I would splurge for one night getting drinks with my friends and feel sick with guilt for the rest of the month. The back and forth I felt over my finances took a toll on my mental health, my physical health, and my academics because I wasn’t giving myself the tools I needed to be successful.
When I first started budgeting I didn't know where to begin. I wanted something where I could set spending goals and monitor where my money was going. I tried looking for templates online but none of them seemed to fit my needs. I was still in school and was working a couple part-time jobs at the time so I struggled to relate to the sample numbers of having a $60,000 a year income and spending $500 on groceries. I couldn't get relate to it so I struggled to set it to my own information. Instead I made my own spreadsheet. Even though I wasn’t making a lot, keeping a log of all of my purchases each month helped ease the anxiety I felt. It made me feel like I had more control over my financial situation because I could take this intangible concept of cash flow and turn it into something more concrete. Seeing where every penny I spent fell helped me feel more aware of how much I had left for the month. Over time I got a better grasp of where my money was going and I began to develop better saving habits too. Seeing in a spreadsheet the difference between going out for Chipotle or stashing that $13 into my savings account helped motivate me towards the financial goals I had for myself. Two years later I’m still in debt and I’m far from the perfect budgeter, but I have a stronger grasp of where my money is going. More importantly I don’t let my budget own me. It may feel like budgeting puts a financial leash on your spending, but in reality it’s done the opposite for me. It’s given me the freedom to stress less about money. No one’s financial situation is perfect, but budgeting helps me feel more in control about where I’m steering my future. How can you use a budget to work towards your own financial goals?

You know when you have envision the perfect outfit? Whether it's for a particular event or all seasonal long, when you have that perfect skirt in your head it's hard to substitute another piece when it's just not quite right. Most of the time I find myself caught between two fashion choices. One, I can find something in the same ballpark as what I'm looking for but it usually doesn't fit me very well, I hate the fabric, or it's so poorly made that it's only good for one wear. Option two, I find something I love but it is way way way outside my budget.
One of the things I love about sewing is that I'm able to take the outfit that's in my head and bring it to life for a fraction of the cost that I would pay in a store. Step 1: Cut the Pieces
Start by tracing out a skirt you like onto your fabric. If you're using fabric with a little stretch to it, remember to keep the direction of the stretch horizontal. That way you'll have a little more give in the fabric in the hips, which will give you a better fit. When cutting remember to leave 1/2" seam allowance around the skirt you're using as a template.
Start by cutting 1 piece that's the shape of a regular skirt. This will become the back. For the front 2 pieces, use the back piece as a template, but draw a long diagonal curve from the top corner to the opposite bottom corner. Make sure the separate the layers of your folded fabric. You want the 2 front pieces to be reflections of each other, not duplicates. Once your pieces are cut out, sew up the sides of the skirt with 1/2" seams. 
Step 2: Add Darts to the Back
One of the tricky parts about making any kind of clothing is taking a two-dimensional piece of fabric and getting it to fit a three-dimensional human. Adding darts to clothing allows the fabric to fit perfectly around your curves to give clothes that classic well-fitting look.
To make the darts I pinched 1" of fabric in 2 spots on the back piece of the skirt. Remember to measure so that they're equal in distance from the center. Then with a pin mark how far down you want the dart to go down the skirt (mine went down about 2 1/2"). Depending on your waist to hips ratio, you can make the dart deeper or longer to suit how you want your skirt to fit. 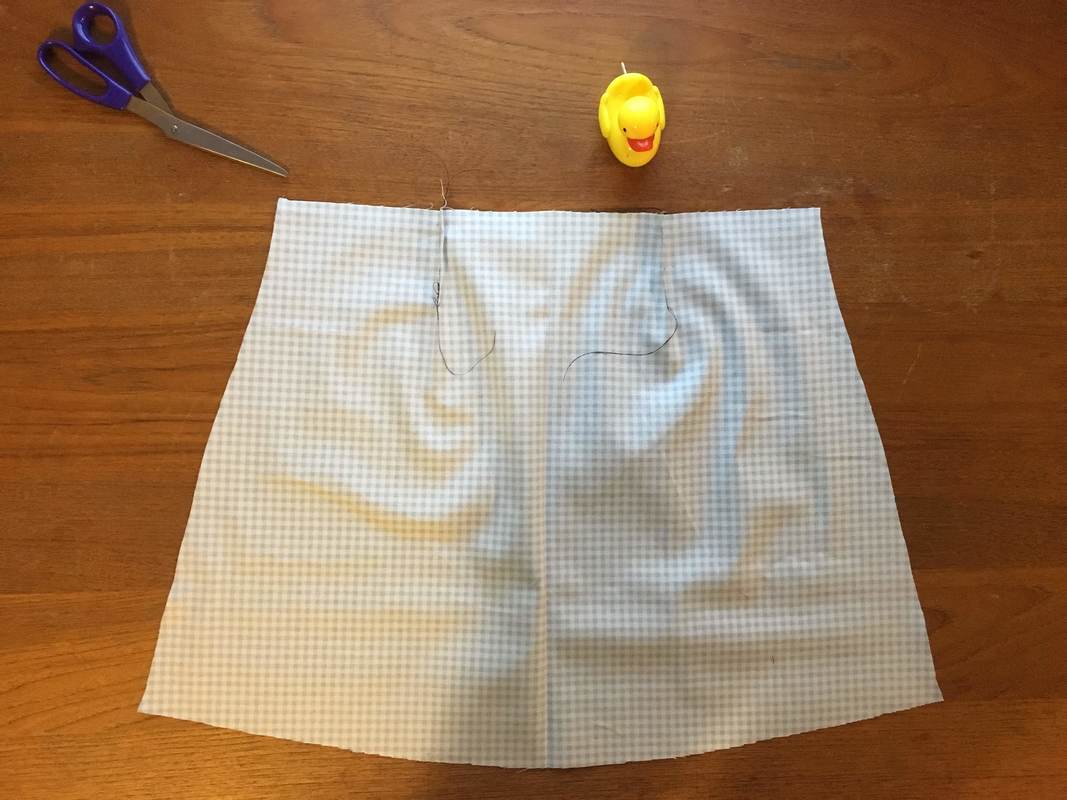
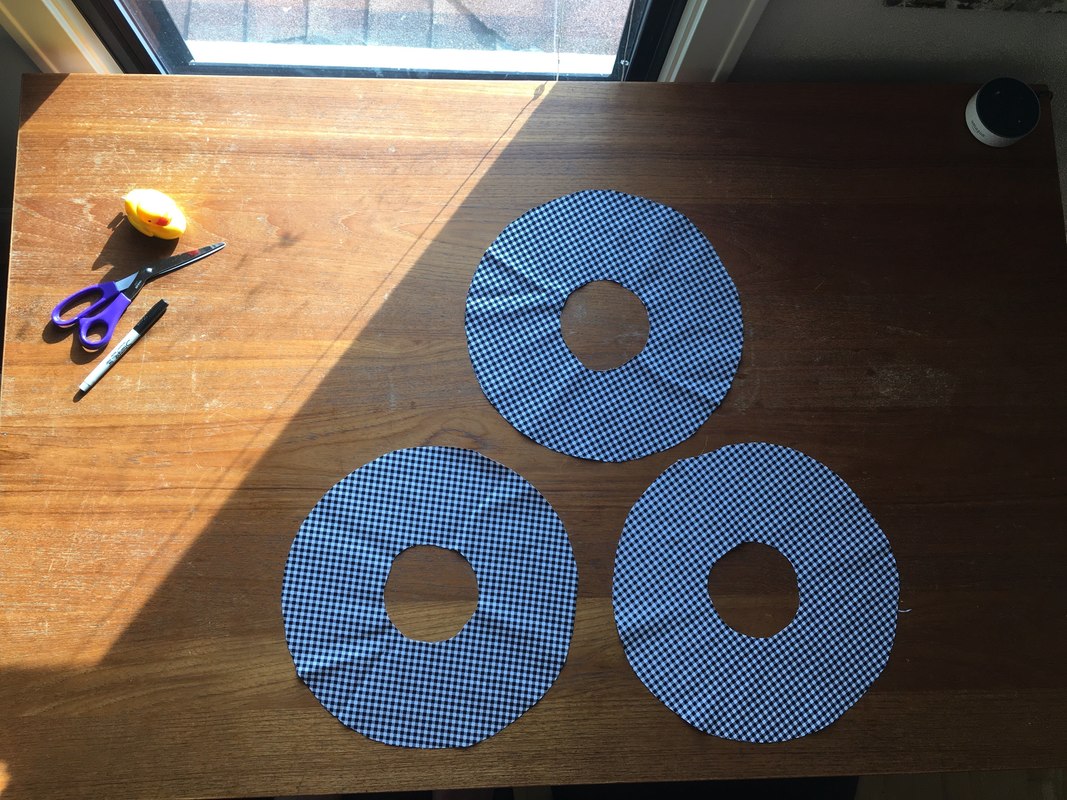
Step 3: Make the Ruffle
To make the ruffle, cut out 5-6 circles. The dimensions I used were 13 1/4" for the diameter of the outer circle and xxx” for the diameter of the inner circle. Once your circles are cut, cut a single line connecting the two circles. Repeat this cut for each of the circle ruffles. This will be the seam that connects all of the circles in to one really long spiral. Don't forget to hem the ruffle after you've connected all the circles. You can use a rolled hem if you'd like so that the raw edge is tucked into the hem. I wanted to save the length of my ruffle I faked a serge stitch with a zig zag stitch all the way around the long chain of connected circles. Then I folded over the edge of the fabric to make a 1/4" hem.
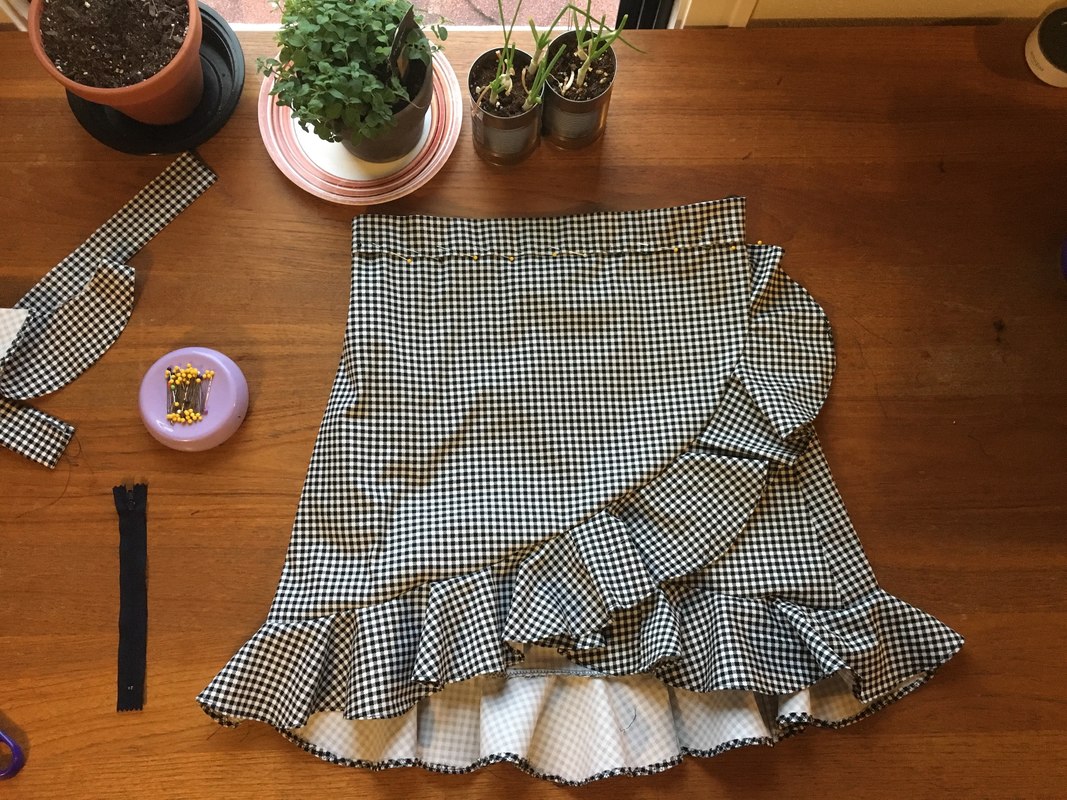
Step 4: Attach the Ruffle
Now's the fun part where the skirt starts to come together. Spread out your spiral chain of connected circles so that it becomes the long ruffle. Pin the inner circumference all the way along the bottom edge of the skirt and sew with a straight seam. Repeat along that same edge with a zig zag stitch to keep the ends from fraying. Once the ruffle is connected, cut the edge of the ruffle so that it tapers at the top near the hip of the top layer of the front of the skirt. On the bottom layer of the front of the skirt, trim the ruffle as needed so the skirt lays flat and comfortably on your hip.

Step 5: Finish with Waistband and zipper
To add the zipper, here is a link to my favorite zipper tutorial. You can place it on the back like I did, or place it on the side of the skirt.
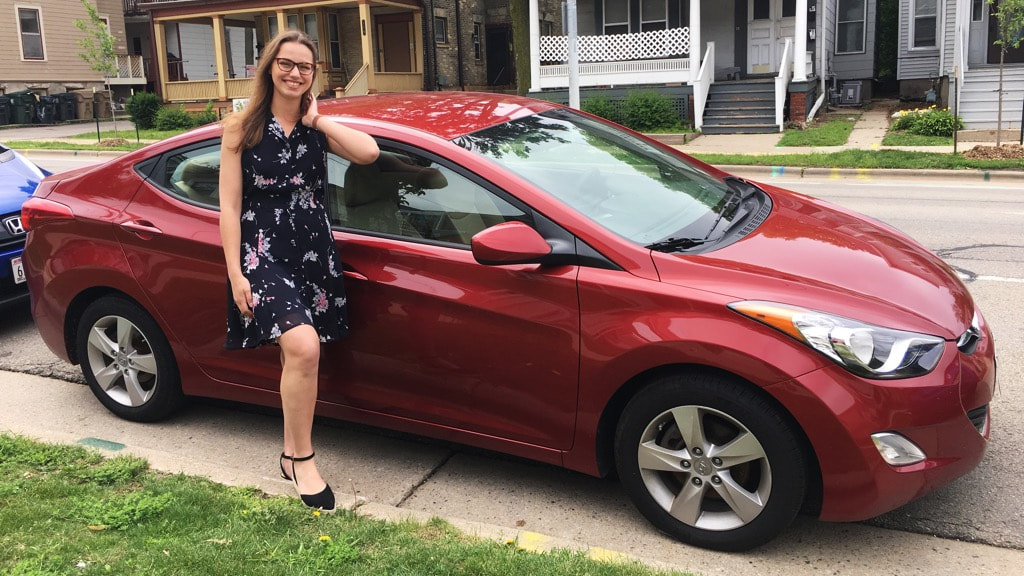
I recently bought my first grown up car. I’d been saving for a down payment for the better part of a year, and this summer I was finally ready to test drive and buy a car. Since this was my first big adult purchase, over the past 6 months I did a lot of research on purchasing used cars. I learned that there’s an overwhelming amount of information out there, but there is a lack of help when it comes to learning how to negotiate.

We live in a world where nearly everything is negotiable, but you won’t get anything unless you ask for it. I spend a lot of time at work building budgets and negotiating them. When I first started, I felt out of my comfort zone and daunted by the process. The more practice I got, the sooner I realized that negotiating was only scary because I told myself it was. Negotiating at work gave me the confidence to start negotiating for things in my personal life. Keep in mind that the more research you do before you buy the car, the more confidence you'll have. The more confident you are, the easier it will be to negotiate. You owe it to yourself to try to get a better deal. All you have to do is ask. The worst they can say is no.
2. Research Vehicles by Make, Model, Year, and Fuel Efficiency. There are a lot of cars out there. Once you know how much car you can afford, you can sort through the different makes and models to find which cars are actually in your price range. Kelley Blue Book and JD Power Dependability Award ratings are great starting points to look up how different makes and models stack up. For example, although I would have loved to get a Honda Civic or a Toyota Camry, neither of them were in my price range so I looked at other cheaper but still good quality models from Kia and Hyundai. If you’re browsing through JD power, make sure you’re looking at the correct year. Even Civics and Camrys can fluctuate significantly in quality from year to year.
3. Think About How Much the Car Will Be Worth When You’ve Paid Off the Loan. Based on the research you do in Step 2, you’ll quickly realize that not all cars maintain the same value as they age. If you’re comparing a $12,000 car from 2012 that is only worth $4,000 in 5 years when you’ve paid off the loan, with a $13,000 car from the same year that’s worth $6,000 in 5 years, that extra $1,000 when you purchase the car may help you in the long run. 4. Over the course of 2-3 months, research average prices at local dealerships. The more you know about what cars are regularly available at competing sellers, the easier it will be to identify a good deal. 5. When you’re at the dealership, ask lots of questions and be persistent when you don’t get a straight answer. When I was shopping for my car, I asked the salesperson a lot of questions about the history of the vehicle. I wanted to see the history report myself and I wanted to know the specifics of the car loan that the salesman said I was “pre-approved for”. As a woman who was solo car shopping, it was very difficult to get a direct answer from the salesman. Maybe it’s because I was a woman asking a man specific questions about the car, or maybe the salesman wasn’t used to a customer (regardless of gender) asking several questions. Either way, when I didn’t get an answer to one of my questions, I asked it again until I got a straight answer. Here are some good questions to ask when considering purchasing a car:
6. Always, Always, Always Make an Offer That’s Lower Than the Advertised Sale Price. Even if it’s already marked down. Even if the salesperson has already told you the value of the car. Even if it feels like you’re being too pushy. Even if it’s scary. Especially if it’s scary. The more you normalize talking about money and negotiating a better deal for yourself, the easier it gets. What do you have to lose? It’s not like the dealer will refuse to sell you the car just because you asked for a better price. And if the salesperson still can’t make you an offer you can work with, it’s okay to walk away. There will be other similar cars in your area. Asking for a better price isn’t a scary conversation. It can be as simple as:
Emma: The car is currently marked at $11,000 after the Memorial Day Sale pricing. That’s still a little too far out of my price range. Can you do $10,000? Stewart Salesperson: The car is normally priced at $13,000. I can’t do $10,000. E: How about $10,500? S: If you agree to purchase today with financing, I can go to the owner and ask him to approve this. **Spoiler alert, it’s rare for the owner to quibble over a few hundred dollars. Even though I didn’t get what I initially asked for, I got two and half months worth of monthly payments for free just because I asked for it. What do you have to lose? 7. Negotiate For a Better Warranty. One of the things I didn’t think about when I went to purchase my car was the warranty. After you sign to purchase the car and they run your credit card for the down payment (welp), you’re ushered over to the loan specialist who will try to sell you the more comprehensive warranty package and tells you what APR you just signed up for. This is why it’s important to make the salesperson tell you your "pre-approved rate" beforehand. Ask for specifics about the extended warranty and how it compares to the standard warranty. It’s your money. It’s okay to be assertive. You’re not being pushy, you’re asking for the facts. For example: Finance Phil: For an extra $3,000 you can get the extended 3-year warranty that covers more than the complimentary 3-month engine warranty. Emma: That’s too much. I can’t afford the warranty. F: What about if I have it included in your monthly payment? E: You still haven’t told me what my monthly payment is going to be. By how much will the warranty increase my monthly payment? F: With the warranty, your payment will be $210 a month. E: And without? F: $175. E: I was looking to keep my monthly payment under $200. I’m sorry but that’s still too much. F: What if I changed the length of the warranty from 3 years to 4 years? E: That’s something I could potentially agree to. F: If you agree to purchase the extended warranty, I can go to the owner and ask him to approve this. *Shocker*, he did the same approval song and dance as the salesman and *shocker* the owner approved the deal. 
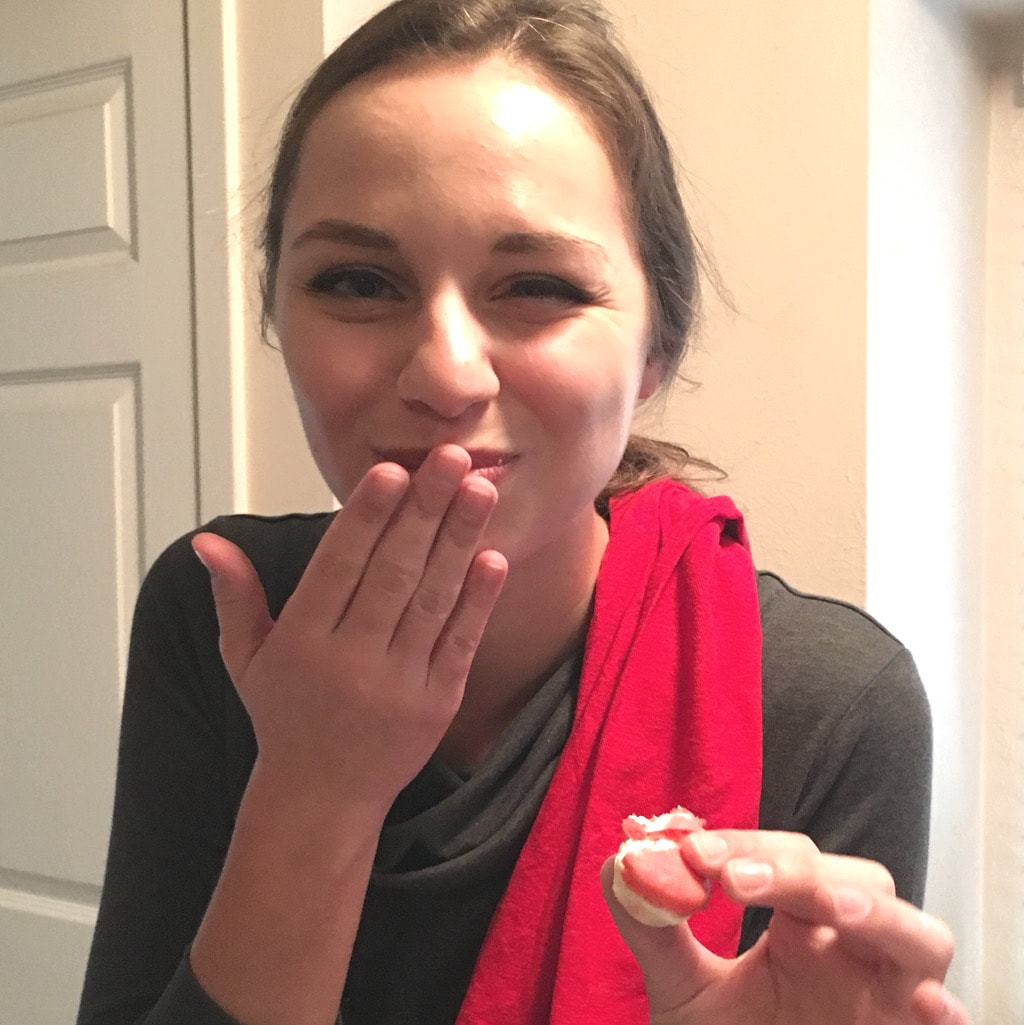
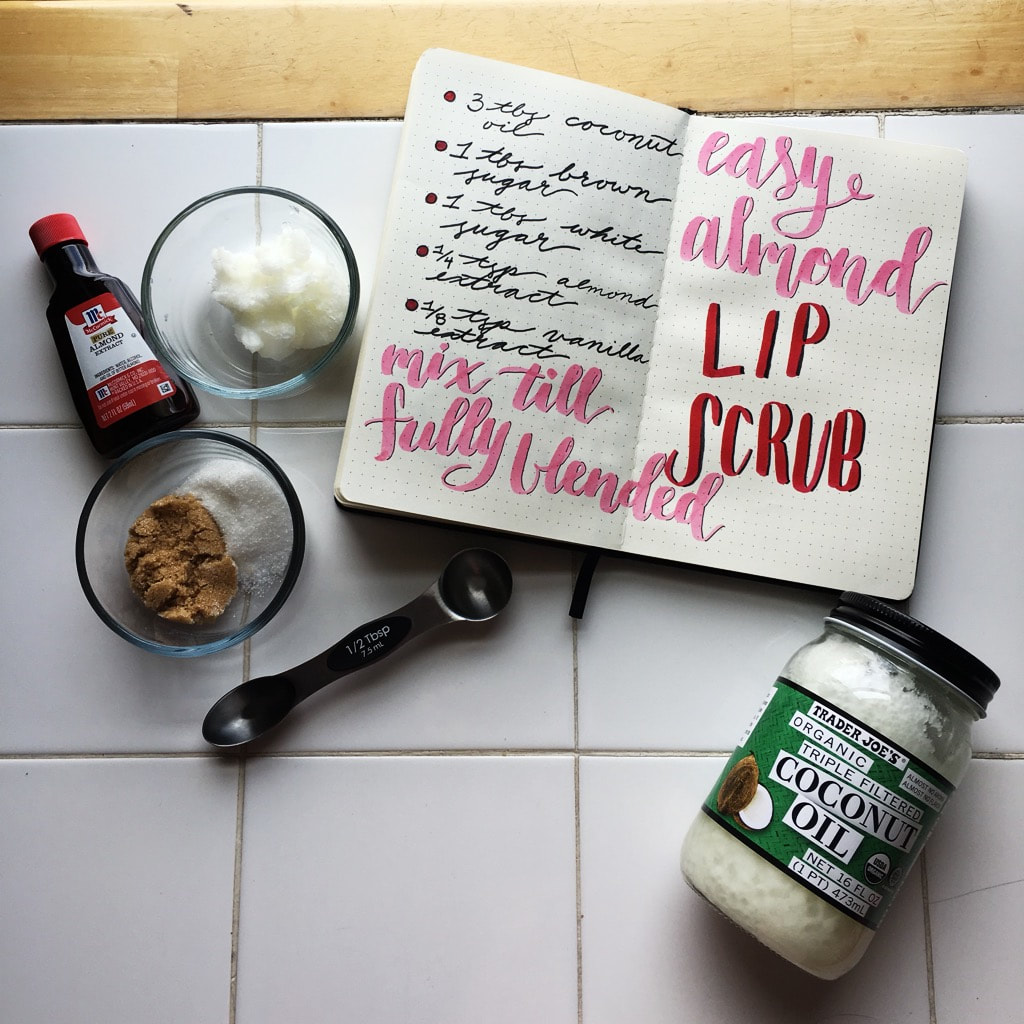 Despite the April snow storm earlier this week, it is finally spring! I dont know about y'all but my skin could definitely use some TCL to clear out my dry winter layer and make room for spring and summer. Lately my lips have felt like a chapped, flakey mess and no amount of chapstick has been able to hydrate and clear out that dead skin. Lately I've seen a ton of promotions in-stores and on socials for sugar scrubs. Being an avid DIYer I hate spending $10 on something that I can do at home. In the spirit of Earth Day, I decided to make my own lip scrub entirely from ingredients I had at home. Over the past few months I've tried to make a conscious effort to reduce the trash that I produce. One of the ways that I've done this is by purchasing more dry goods from the bulk foods section of grocery stores. You weigh your own container, scoop out how much you want, and boom you've got a trash free way to purchase goods like coffee, rice, nuts, beans, flour, etc. The bulk section is awesome for specialty ingredients like nutritional yeast or ariboro roce that I need for a specific recipe and dont want to buy a large package of. I've also noticed that I spend less money buying from the bulk section on items like quinoa, coffee, rice. Good for your wallet and the planet! However, very few stores offer bulk shopping and if they do, they don't usually encourage shoppers to BYO container.  One of the great things about this recipe is that most of the ingredients can be purchased in bulk bins (the sugars) or come in containers that can be reused (coconut oil) or recycled (almond and vanilla extract). Give the planet a hug this Earth day and try to reduce your waste!  Ingredients 3 Tbs coconut oil (You can use filtered or unfiltered. Ive noticed that unfiltered is a lot smoother in texture and has a nice coconut flavor) 1 Tbs brown sugar 1 Tbs white sugar 1/4 tsp almond extract 1/8 tsp vanilla extract Mix everything together in a small bowl with a rubber spatula. Make sure to store the scrub somewhere that doesn't get direct sunlight or get too warm otherwise your coconut oil will start to melt. If that happens, don't worry. Just pop it in the fridge for a few minutes and it's as good as new. 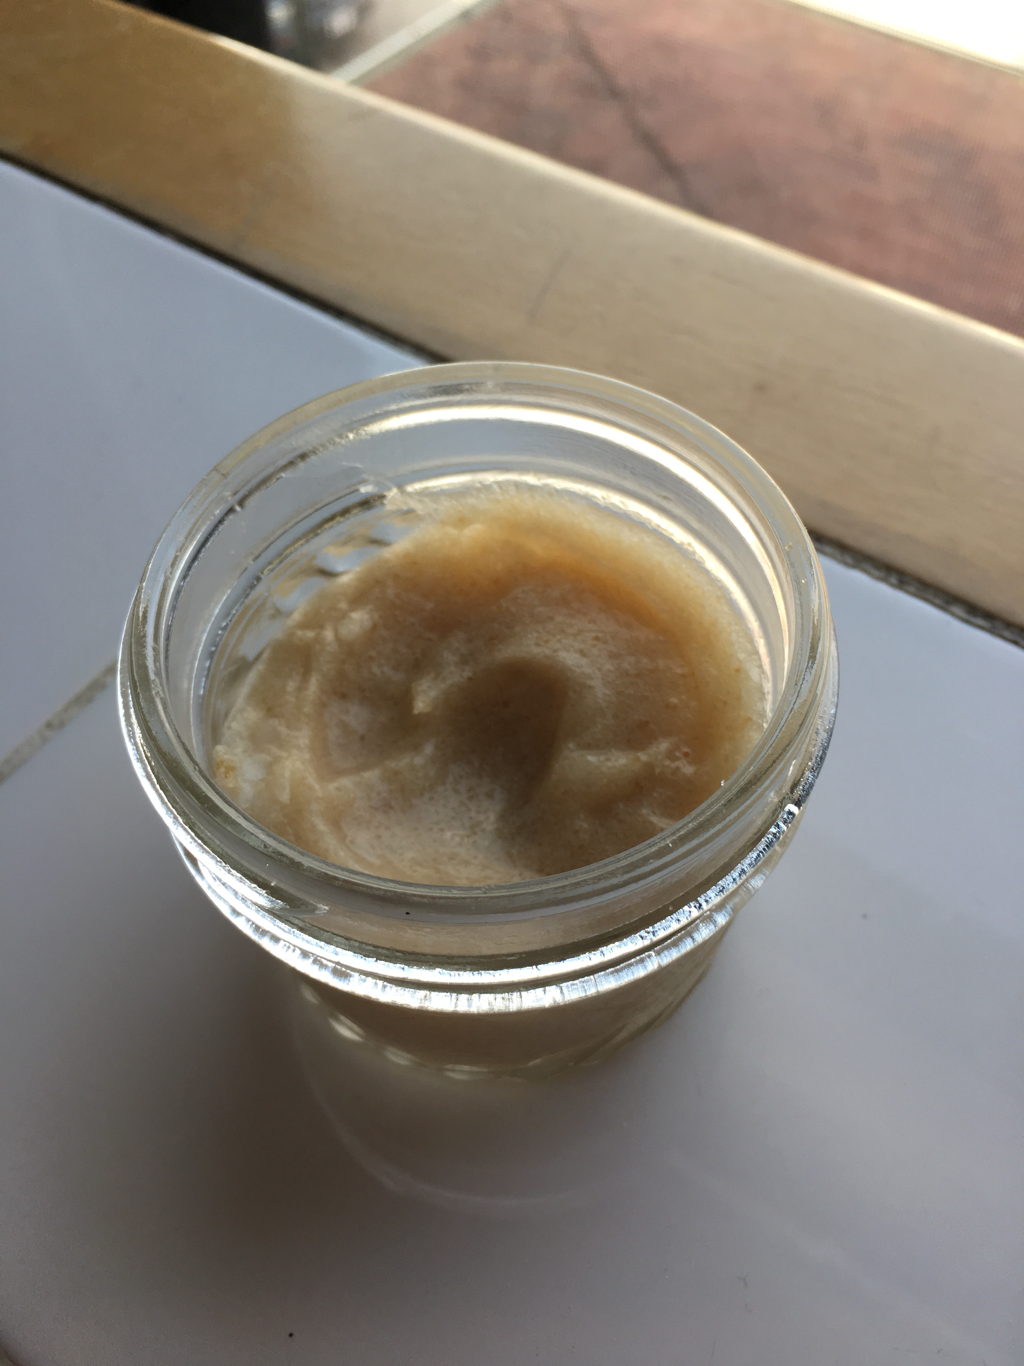 When you're ready to use your scrub, take a small finger scoop and scrub it all over your lips for 1-2 minutes to exfoliate. After your finished wipe off the excess sugar with a cloth and let the coconut oil work its magic. Remember to put some chapstick on when you're finished to really lock in the moisture.
Recent Grad Finance 101: Save Smarter, Not Harder
For us recent grads out there, saving for big ticket items like cars, houses, or an emergency fund can feel impossible. Not to mention that most of us have more student loans, lower entry level wages, and a higher cost of living than our parents' generation, but I digress... I finished my undergraduate degree in May of 2017, which means I'm well past my student loan grace period and know too well the woes of watching my paycheck go towards my student debt and other necessary expenses.
There's a lot of financial advice out there on how, when, and how much to save. Some people will tell you that to be financially successful you have to pay off all your debt as soon as possible, even if that means waiting to create an emergency fund. Now to an extent, this makes sense. If you have debt with high interest rates (credit card debt and some auto loans) then it's a good idea to get that paid off as soon as possible. But when you have "necessary" debt (subsidized student loans, some mortgages, etc.) with lower interest rates and you are already managing your monthly payments, it's a important to prioritize putting a little money aside every month for emergencies. 
For example, I've got a little over $75,000 in student loans, 0 credit card debt, and no auto or home loans. Yes, my student debt is higher than the National Average, but I usually exceed my monthly payments, pay on-time every month, and my student loans have lower interest rates compared to other kinds of debt. In my situation, it makes more sense to prioritize planning for emergencies instead of waiting to pay off all my debt. No, I don't have the full recommended 3- 6 months worth of expenses sitting around in my savings account. But I've got enough to keep me covered on a rainy day.
About a week ago I had some car trouble where I found myself with some unexpected expenses. Because I've been putting away a little bit every month into my savings instead of putting that extra money towards my student loans, I didn't have to worry about the cash I needed for the uber home, car repairs, a new battery, AAA membership to jump/tow my car, etc. To be honest, I was lucky in the sense that the repairs could have been a lot worse. However, this experience made me realize that I want to be more proactive about my savings. 

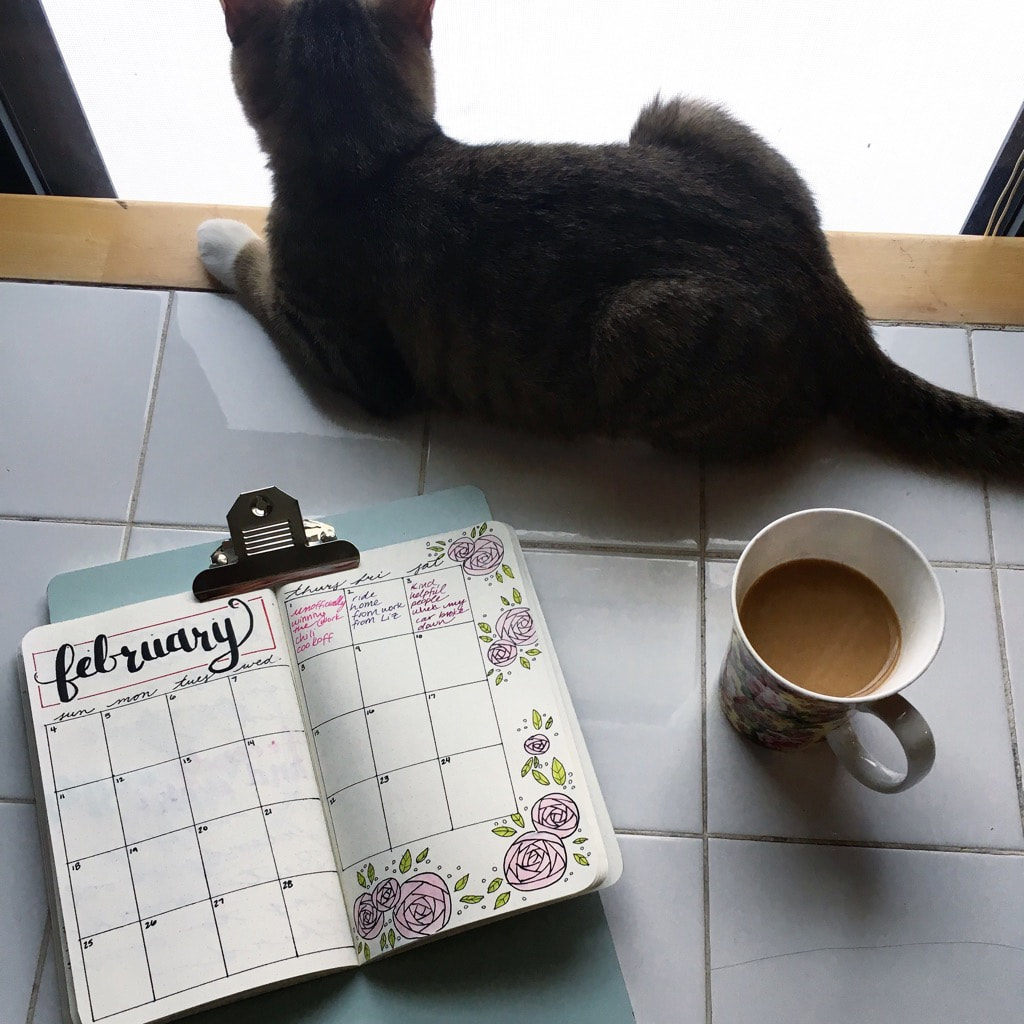
If you've checked out my Instagram lately, you've seen that it's covered in these big cursive letters. Over the last month I picked up the art of bullet journaling. I was hesitant in the beginning because I never thought my handwriting was fancy or good enough and that I would constantly make mistakes and ruin pages. Inthe course of a month I've learned that you don't need perfect handwriting to be good at brush lettering. My letters are still streaky and inconsistent but filters work wonders y'all. The truth is bullet journaling isn't about being perfect, and it shouldn't be.
The truth is, bullet journaling isn't about being perfect, and it shouldn't be.
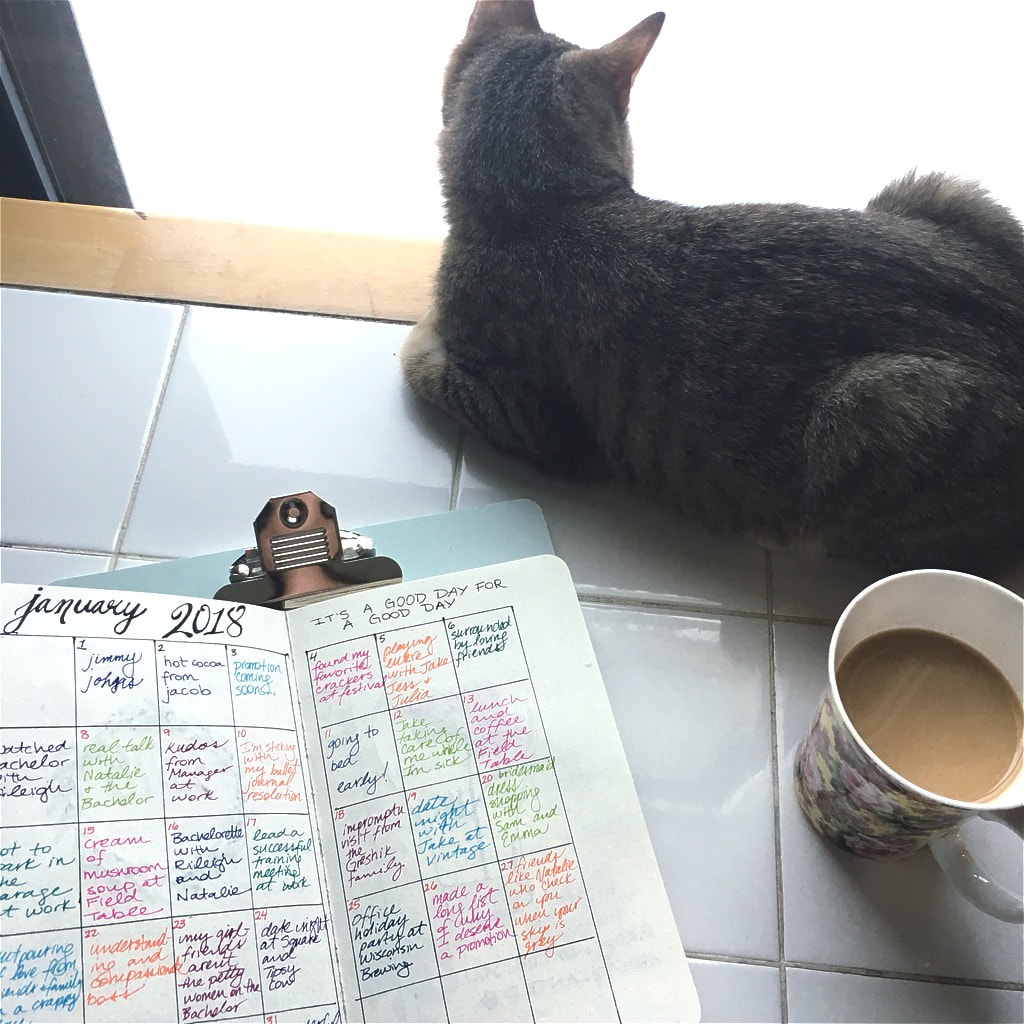
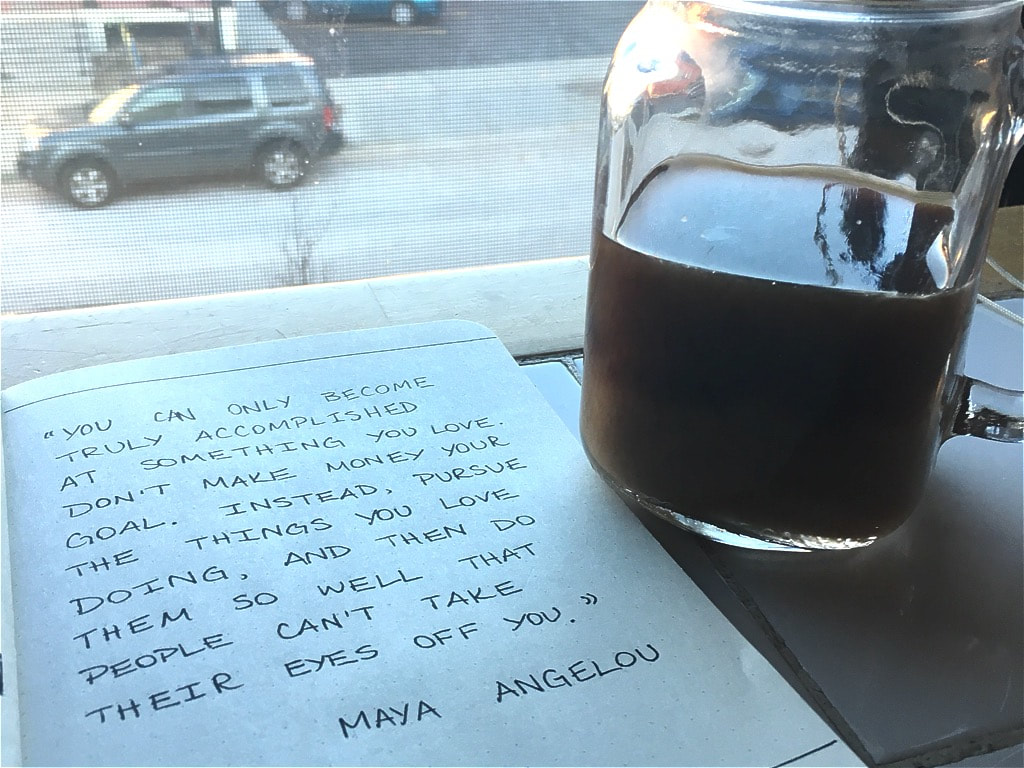
In the past month I've used my bullet journal for everything from to-do lists, to tracking my habits and writing inspirational quotes. One of my favorite things to do is draw out lines for a calendar page and every day that month write down one good thing that happened that day. Even on the days where everything goes wrong if I can come up with one little thing that was good (even if it's literally that my coffee stayed warm longer than I was expecting) I will feel a little bit better. After doing this for a whole month, I can say that this habit has helped my mental health, my mood, and most importantly helped me remember to be thankful
1. You will make mistakes and that's okay. Shit happens. You'll use the wrong color, misspell something, and you'll think your page is royally screwed up. News flash: it's either good enough and if it isn't, move on. Cross it out, make it into something else, and the sun will come up tomorrow.
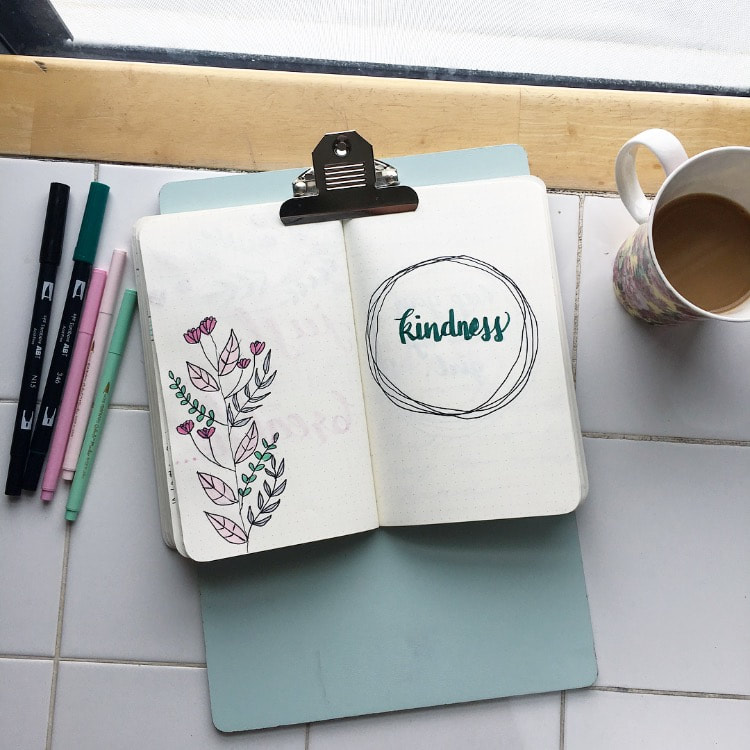
2. Good pens make a difference. Ive got cheap pens and expensive pens and let me be the first to tell you that the difference between them is night and day. You definitely don't need to only buy expensive tools. There are some great affordable supplies out there (some of my faves below) but having a few versatile quality pens in your stash is awesome. Some of my favorites are sharpie pens (cheap and good quality) for thin clean lines, these pastel brush pens(great if you're looking for an affordable brush tip pen), and my Tombow Dual Brush Tip Pens (pricey but amazing). There are no rules for bullet journaling. It's about doing what you want, how you want.
3. Practice, practice, practice. In just a month, both my layouts and letters have improved so much. Take a look the difference between these two pages. At the beginning of January I was so bad at lettering I was still doing faux calligraphy with my ballpoint pens. A month later, I'm much better with a brush pen and I decorate my pages.
4. Spend money on a good dot journal. My first dot journal was a great first journal. For a beginner like me, a simple $8 dot journal was all I needed. It got the job done and was an good size and shape for what I wanted. However most of my pens bleed or ghost through the pages and it doesn't lie flat. Now that I'm a little more experienced and know that I'm sticking with this hobby I'm going to invest in a higher quality journal.
5. There are a ton of awesome lettering blogs out there. Follow #bulletjournal and #brushlettering for great journal layouts and for lettering styles. This is a great starting point for inspo. Some of my favorites are TombowUSA, the Mapi Method, and BonJournal.
6. When you cant buy everything, having two different color families is enough. I have two sets of brush tip pens. One with standard ROYGBV and a set of pastels. Having both lets me do the bounce lettering in both bold colors but I also love having pastels to color in with, use watercolor techniques, layer colors on top of one another, and and for brush lettering too of course! 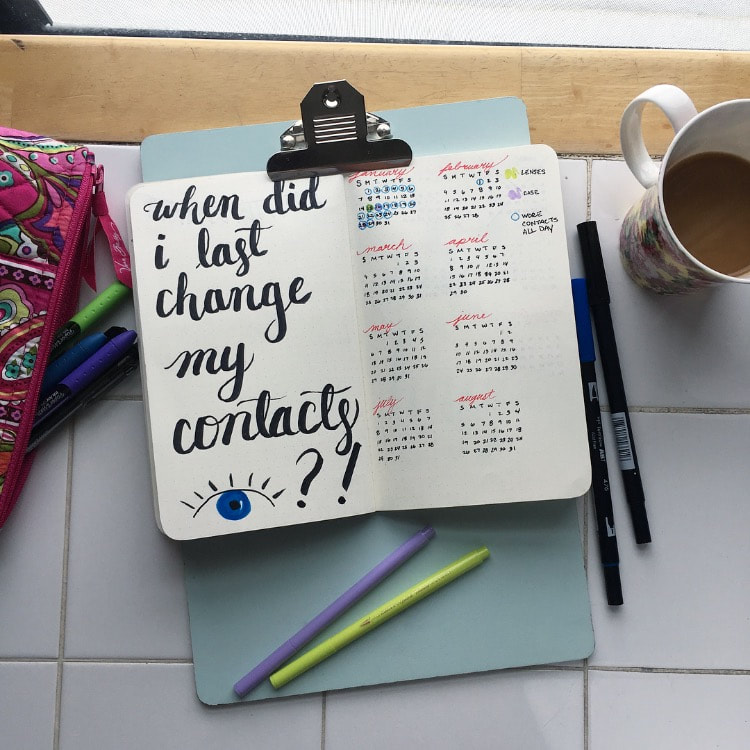
7. Storage and a few simple accessories make your life easier. Clipboards are the ***t! With mine I can journal on my bed, the couch, random coffee shop counters without needing a large surface. I also keep all my pens, pencils, and eraser in a little zipper pouch. It keeps me sane and makes packing up anywhere a breeze.
8. It's your journal so do whatever the ***k you want. If you want to make lists, do it. If you just want to write quotes, do it. If you want to doodle, do it. There are no rules for bullet journaling. When I come home from a long day and want to vent, I write profanity in big swoopy letters. Surprisingly, I feel better. The self-validation of writing something down is therapeutic. It's why I love blogging here at Cold Brew and why I love bullet journaling. 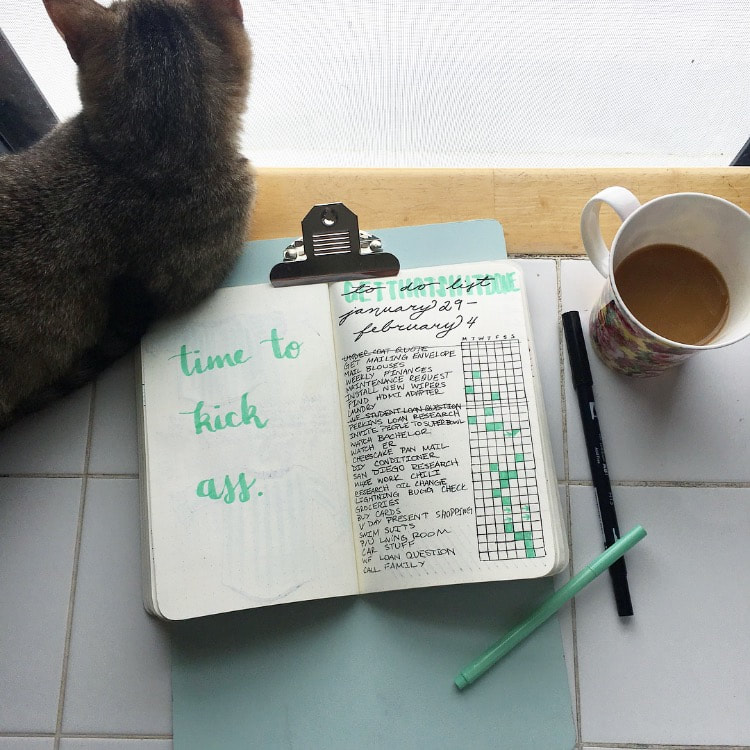
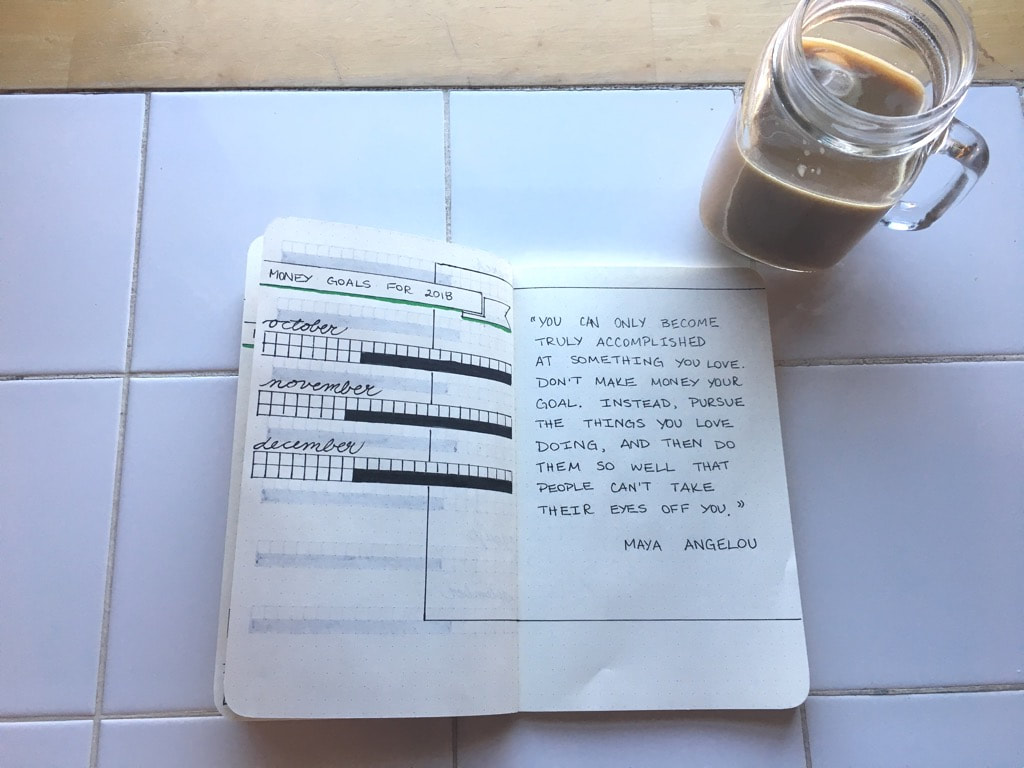
 You know that picture of your future self you have in your head where you’ve got a good job, a versatile wardrobe, and a beautiful home that looks like an interior designer lives there? I constantly tell myself, “One day when I’m a real adult I’ll have this or that…” Someday I’ll feel like I’ve got my life together enough to feel more confident with what I’ve got. That all of this struggling and saving in my 20s is going to pay off eventually. I want to do a better job of being conscious of how much of my hard-earned paycheck I’m devoting towards my wants instead of my needs. A New Year, means a new me, right? It’s the first day of the year and I’ve been thinking about the things I set out to accomplish at the start of 2017. Where did I succeed? What can I do better next year? This year I want to focus more on getting closer to the happy healthy future self I see in my head. So instead of focusing on all of the obstacles in the way of getting there, I want to think about concrete steps I actually can take. 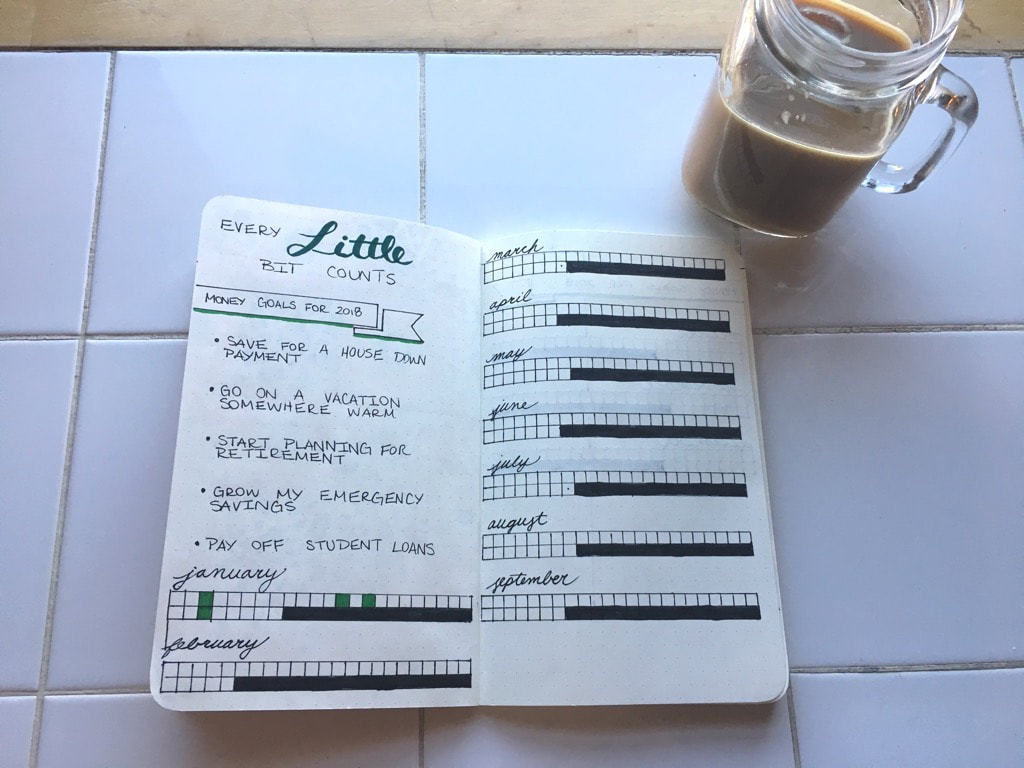
 And what's the best way to keep this resolution, you ask? Remember that I'm not perfect and hold myself accountable to get back on track. I'm far from perfect. I've already impulse-bought from Amazon twice this year. The important thing is that I get back on the horse again and think long term. And in the interest of keeping it Cold Brew and trying new things, I'm using my new bullet journal hobby to help keep myself on track. Happy New Year and happy saving!
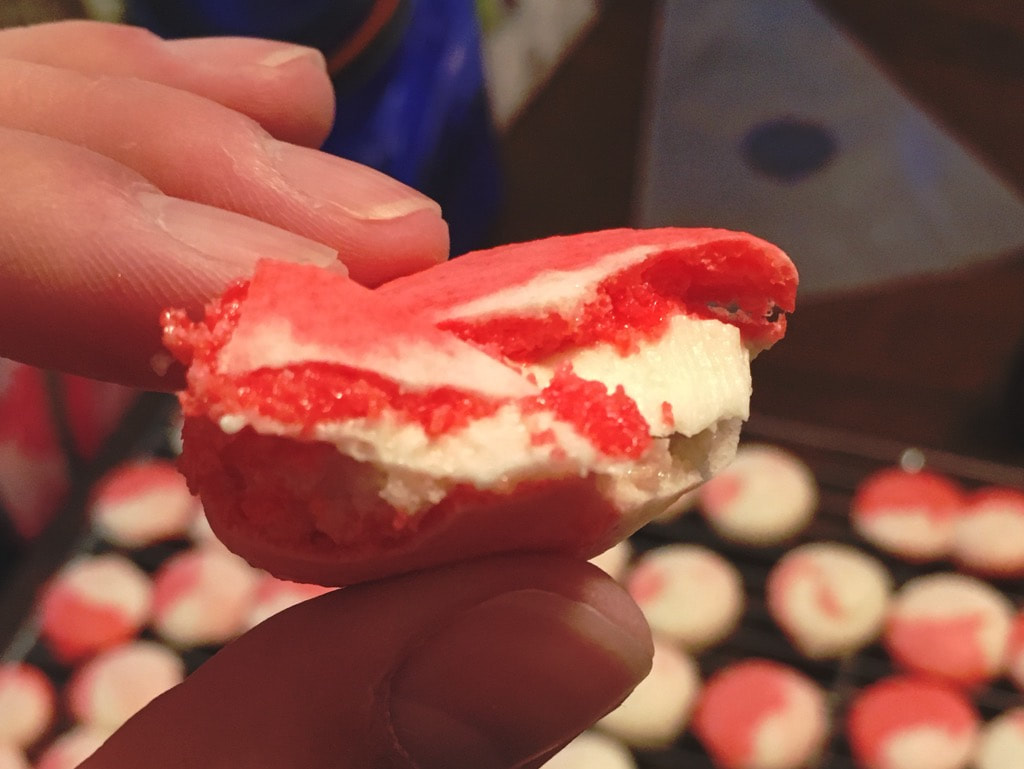
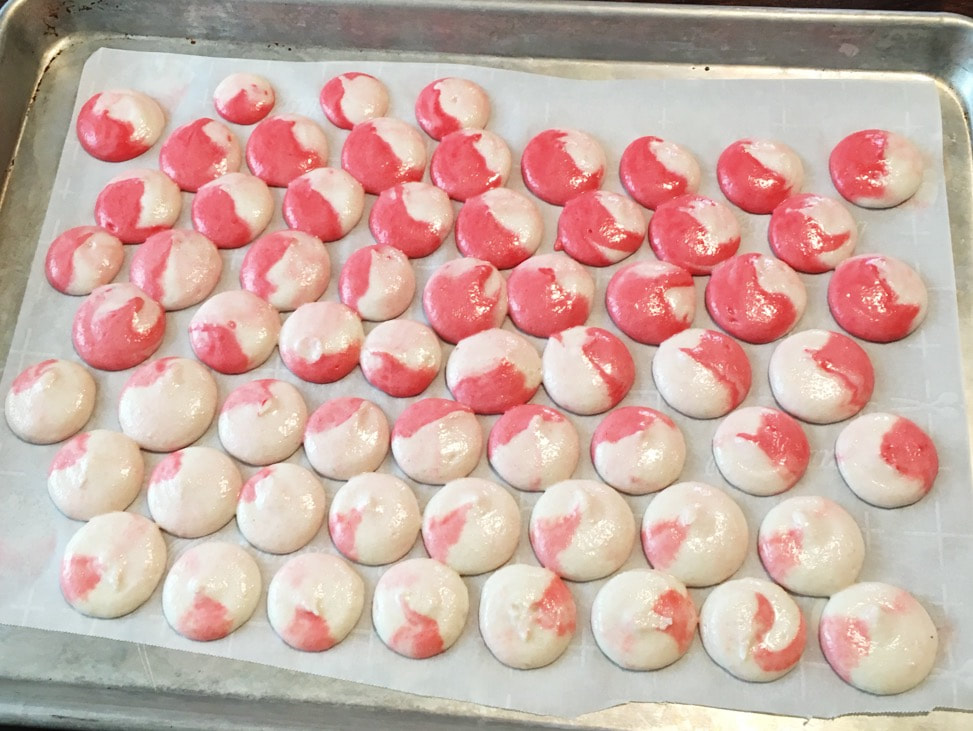
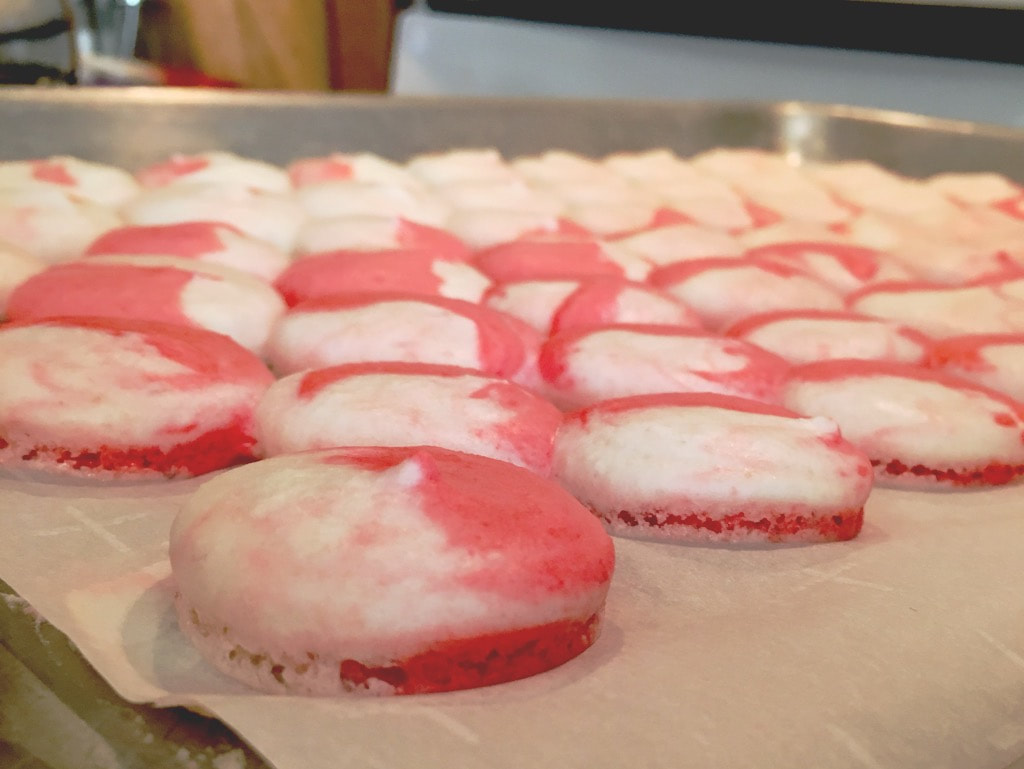
Macarons are tricky. This recipe is my third attempt at making this delicate French cookie. There's a reason why these tiny bits of egg and sugar are so expensive. They're temperamental and can take practice to get perfect. I used the Tasty Macchiato Macaron recipe for my first few attempts, but made a few adjustments to add a festive spin to the treat. Here are a few things I learned about macaron making so you don't have to.
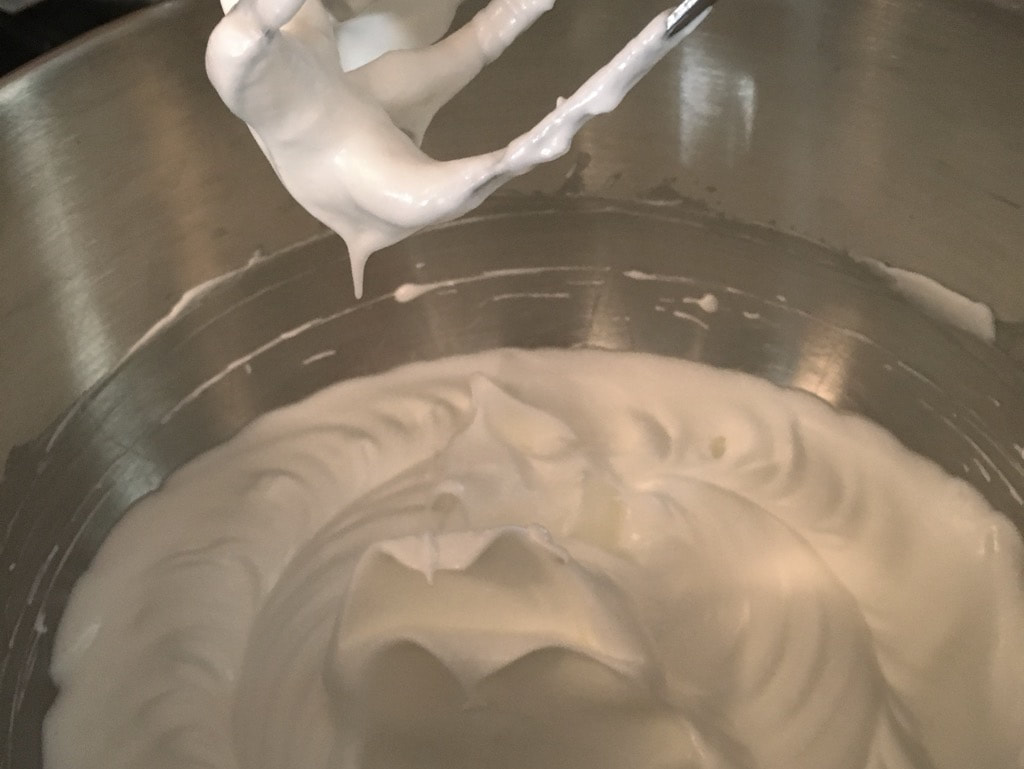
INGREDIENTS
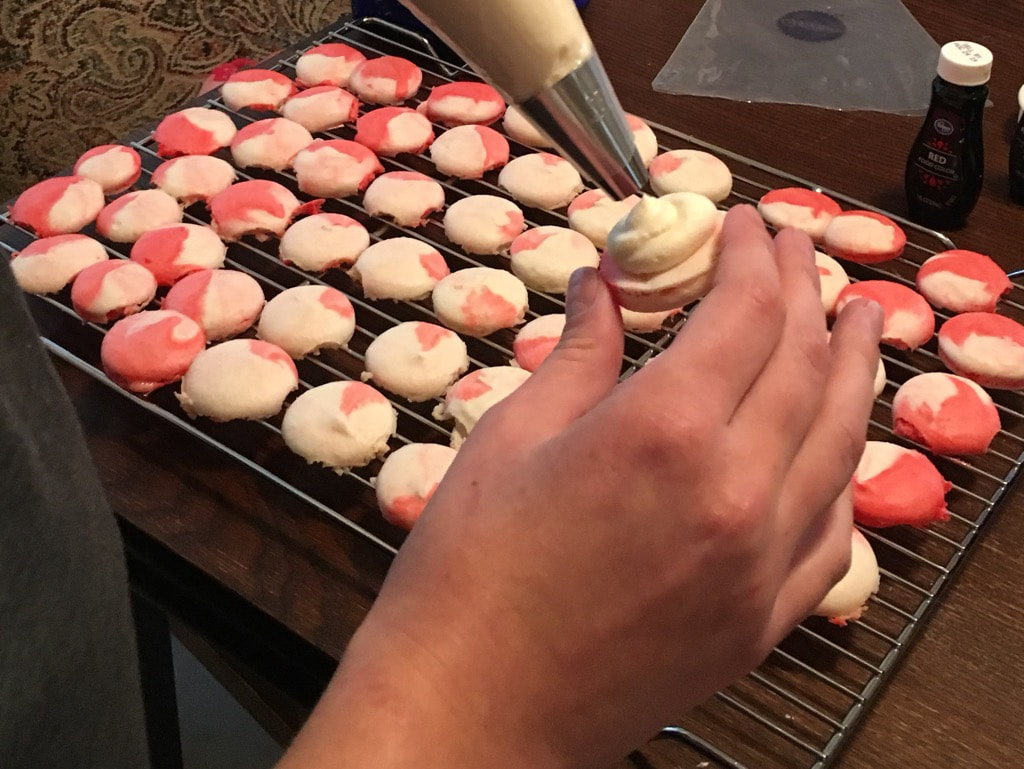
Makes about 30 macarons FOR THE COOKIE: 3 egg whites 1/4 c granulated sugar (50g) 1 3/4 c powdered sugar (200g) 1 c super-fine almond flour 1/2 t red food coloring FOR THE BUTTERCREAM FILLING: 2T and 2t boiling water 1 1/3 c powdered sugar 1/2 t peppermint extract 1/2 t vanilla extract 1 stick butter (1/2 cup)
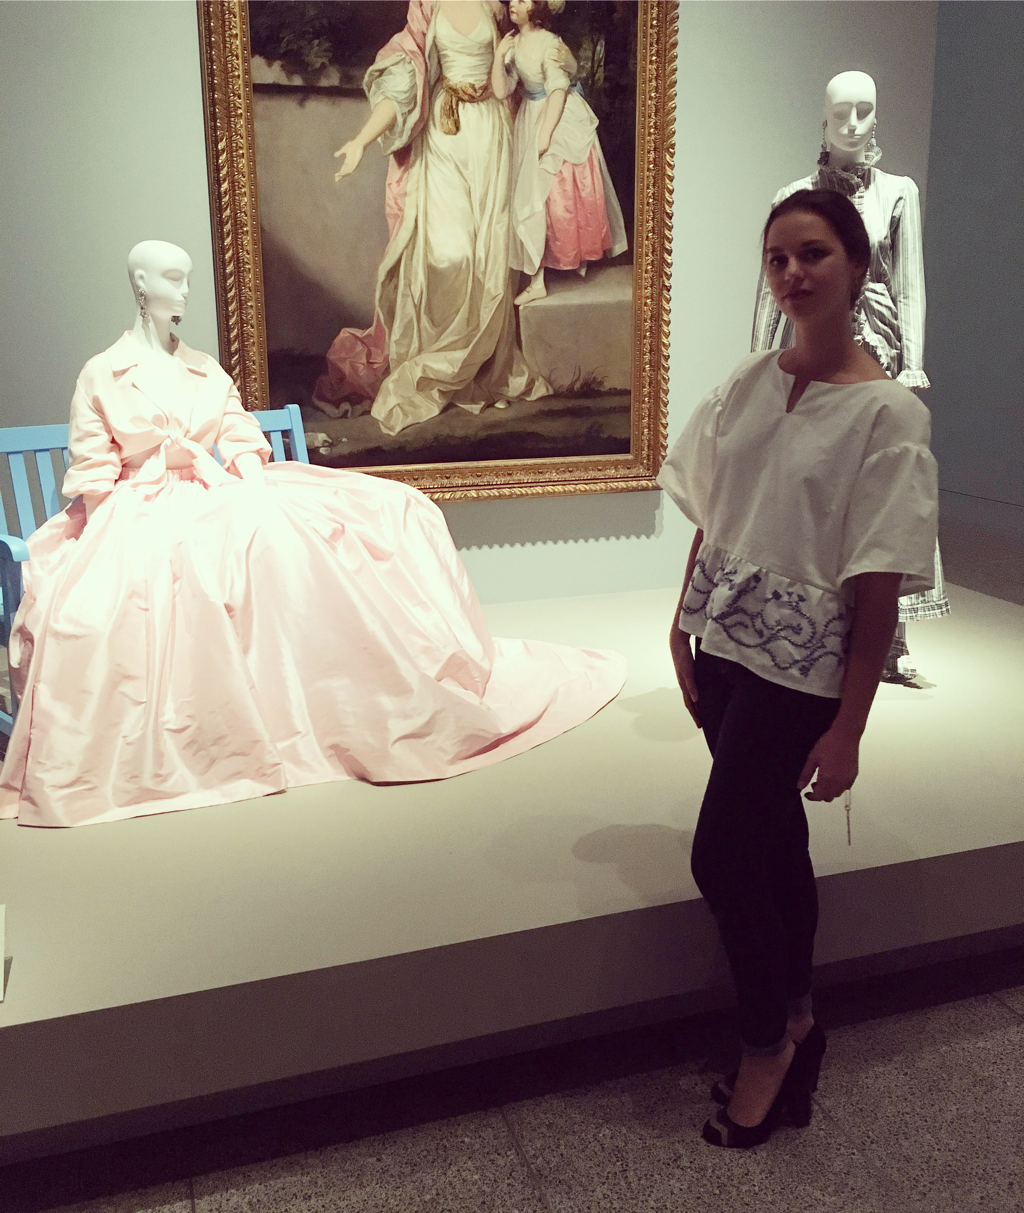 Home means different things to different people. Home is a place. Home is being with your people. Home is your best memories from growing up. Home is love. It's one of the first things you're asked when you meet someone. "Where are you from?" However, what they really mean is, "Are you from the same kind of people that I'm from?" or "Do I know something about you because I know something about myself?" This poses a question that I've never exactly known how to answer. Where am I from? I've lived in California, Texas, and now Wisconsin. Technically speaking, I've been living in Madison for a little over 4 years and haven't continuously stayed in Texas for more than 4 weeks since 2013. So I typically answer, "I've been living in Madison for several years but I used to live in Texas." Which warrants the response, "Why did you come here?" Then I go on with my memorized song and dance about school and how my family is originally from the Midwest, which usually makes people feel better about not knowing where I'm from. I'm from two places and call two places home. Once you get past the constant explaining, one of my favorite things about being from two places is that when I travel I have two great cities to choose from for fun things to do. This past week while visiting my family for Thanksgiving, I visited The Glamour and Romance of Oscar de la Renta exhibit at the Houston Museum of Fine Arts. The intricate embroidery and miles and miles of skirt made my gangly self feel transported to a world of elegance. Oscar de la Renta has been my favorite designer since I was a lanky, awkward teenager living in Texas. The intricate embroidery and the beautiful fabrics with miles and miles of skirt captivated me from a young age, in which my gangly self felt as if I could belong in a world of elegance. I remember when Target and Neiman Marcus collaborated in 2012-2013 I purchased this beautiful white floral Oscar de la Renta tote. As a 17-year-old, it was one of my prized possessions. Even though I didn't have a prayer of owning a true piece, when I held that bag in hand I went from young girl to glamorous woman ready to conquer the world. 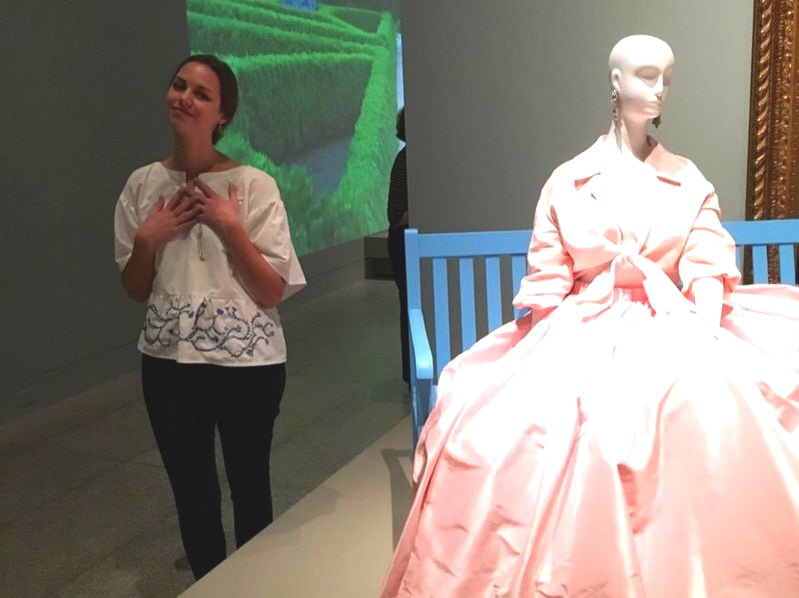 As I walked through the exhibit with the key chain from that very bag, I remembered how much I've changed since my Texas days. I have friends and family that I love dearly and I'm in the early stages of my career. I'm a little worse for wear from life, but still consider myself happy. I feel like the life I'm building is one that my 17-year-old self would be proud of.
|
AuthorEmma Neale: (young) adult, cat mom, and aspiring for adventure. Archives
February 2019
Categories
|
||||||||


 RSS Feed
